Once all of the paper was removed we were left with raw walls that were beaten and bruised. Under the layers, we found holes, cracks, a boarded up window, and an old disconnected fusebox. The next day was dedicated to fixing those issues with new pieces of drywall, patching tape, spackle, and even an electric sander. This sander by the way, is awesome and made the job a lot easier. Of course it also left a thick layer of sawdust all over the house, even some on the puppy.
After a night of rest, take-out Chinese food, and some fresh air, it was finally time to paint! We wanted a sage and white combination which is very calming and green is Sue's favorite color. First, we needed to seal the walls.
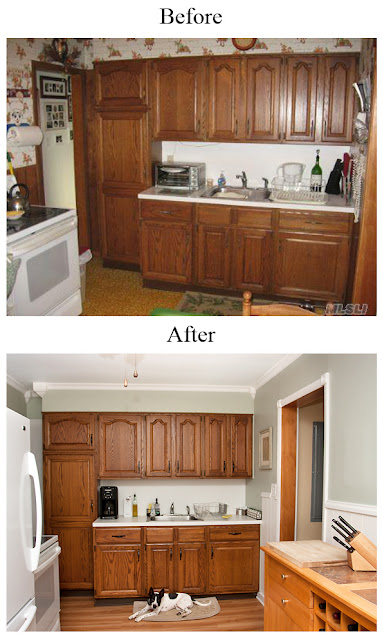
After this dried thoroughly, we painted the previously wallpapered areas with a light sage from Behr called Sliced Cucumber. It went on well, but did require two coats. The room was starting to take shape the way we envisioned. I cleaned up and moved all the appliances back. I also changed the light switch covers, the light bulbs, and all of the cabinet handles. Sue added a curtain to the window and removed the horrible, yellowing vinyl pull-down. What a difference!
A few weeks later we said goodbye to the horrible yellow/orange vinyl linoleum floor, and replaced it with Allure Ultra laminate. We also tore down all of the old brown strips of molding and added white crown molding with corner blocks to add some different architectural elements. The entire process took several weeks, but by doing all of the work ourselves, we saved a substantial amount of money that went into the living room remodel. That's a different story for a different post however. For now, here's a before and after photo of our new kitchen.

No comments:
Post a Comment